That satisfying crack of the bat, the roar of the crowd – these are the moments baseball players live for. But even the most dedicated athlete knows that their equipment takes a beating. A worn-out baseball glove palm, riddled with holes and cracked leather, can significantly impact performance and comfort. Ignoring the damage only leads to further deterioration and potentially injury. Fortunately, restoring your trusty mitt isn't as daunting as it seems. With a little patience and the right materials, you can breathe new life into your favorite piece of equipment, extending its lifespan and improving your game.
This article offers a comprehensive, step-by-step guide to repairing the palm of your baseball glove, transforming a damaged mitt back into a reliable and comfortable fielding companion. Whether it's a small tear or extensive wear, we'll walk you through the process, from assessing the damage to applying the final touches, ensuring you're ready to catch that next game-winning fly ball. Let's get started!
Preparation and Safety Guidelines
- Leather
- Needles
- Thread
- Conditioner
- Use sharp tools with caution. Always cut away from yourself and use a cutting mat to protect your work surface.
- Avoid excessive force when stitching. Too much tension can damage the leather or break your needle.
- Choose the right materials. Using incorrect leather or thread can weaken the repair and lead to premature failure.
Step-by-Step Instructions
Assessment
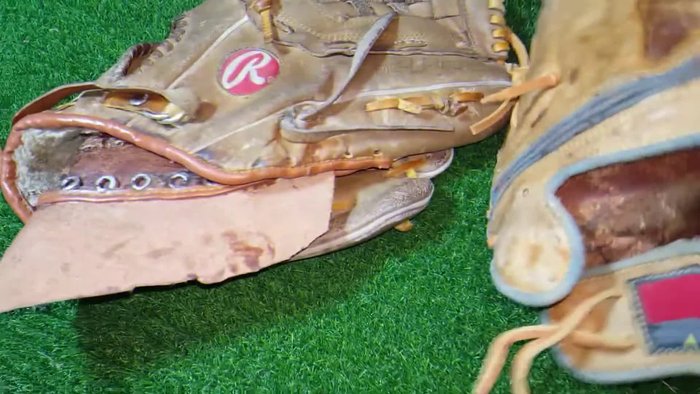
- Identify cracks and worn areas of the glove's palm.

Assessment Preparation
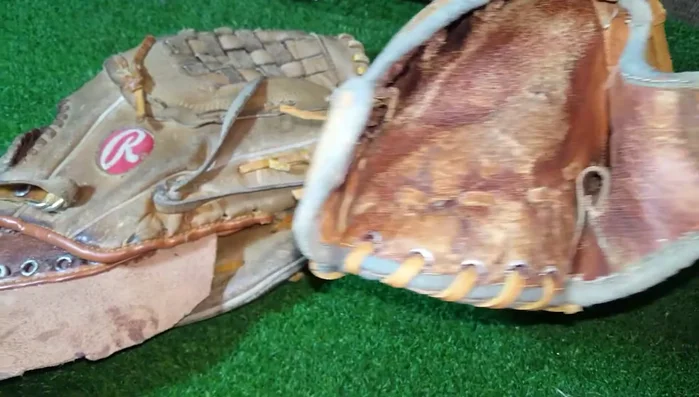
- Select a suitable piece of leather to match the glove.
- Prepare the glove for the repair by cleaning and conditioning the leather.
Preparation Patch Creation
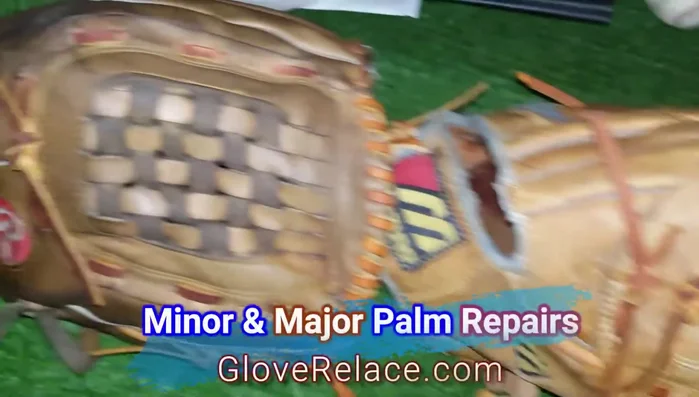
- Carefully cut and shape the replacement leather patch to fit the damaged area.
Patch Creation Leather Application
- Attach the new leather to the palm using strong stitching.
- Securely stitch the new leather in place, ensuring a durable and neat repair.
Leather Application Finishing
- Condition the repaired area to help maintain the leather's flexibility and prevent further cracking.
Finishing


Read more: Ultimate Guide to Staying Warm While Playing Baseball in Cold Weather
Tips
- Proper glove care is essential: Preventative measures such as keeping your glove dry and using conditioner will help extend its lifespan and reduce the need for repairs.
- This repair is for minor damage: If the damage is extensive, a professional glove restoration might be necessary.