Heavy-duty netting, crucial for safety and security in various industries from construction to sports, often suffers significant damage. Tears, holes, and weakened areas compromise its effectiveness, leading to potential hazards and costly replacements. Repairing this robust material isn't a simple patching job; it requires specialized knowledge and techniques to ensure long-lasting, secure results. Ignoring damage can lead to catastrophic failures, emphasizing the importance of prompt and professional repair.
This article delves into the professional method for repairing heavy-hitting netting, offering a comprehensive, step-by-step guide to restoring its integrity. We'll cover everything from assessing the damage and selecting appropriate materials to mastering the crucial stitching techniques that guarantee a durable, effective mend. Following these instructions will enable you to confidently tackle even the most extensive damage, maximizing the lifespan and safety of your netting.
Preparation and Safety Guidelines
- Heavy twine or string
- lighter/matches
- scissors
- flathead screwdriver (optional)
- Always disconnect the netting from any power source before beginning repairs. Electrocution is a serious risk.
- Wear appropriate personal protective equipment (PPE), including gloves, safety glasses, and sturdy footwear. Sharp edges and heavy materials pose injury risks.
- Assess the damage thoroughly before starting repairs. If the damage is extensive or beyond your skill level, consult a professional netting installer or repair specialist.
Step-by-Step Instructions
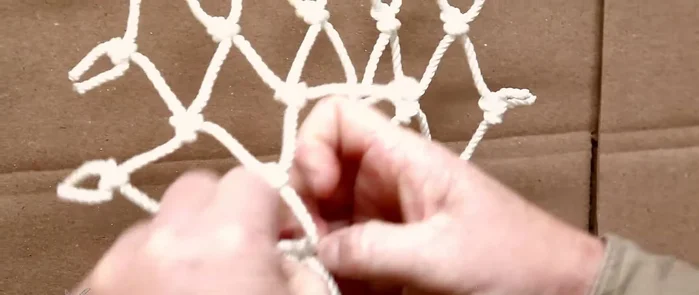
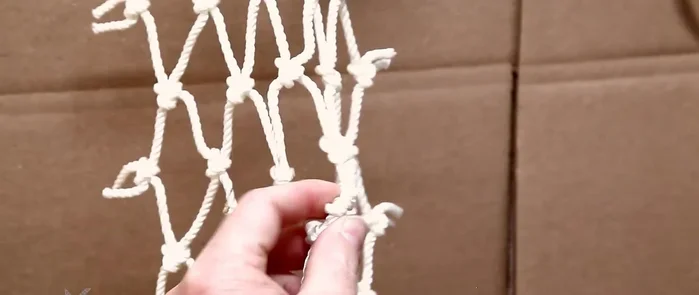
Prepare the Damaged Area
- Loosen and untie the knots on both sides of the hole to gain enough string length for tying.

Prepare the Damaged Area Tie the Initial Knot
- Secure the twine to the existing net strings using a square knot. Ensure the knot doesn't fall between existing knots.
Tie the Initial Knot Secure the Initial Knot Ends
- Burn the ends of the twine to prevent unraveling and melt them to the knot. Use a flathead screwdriver to press the ends against the knot if needed, adding extra security.
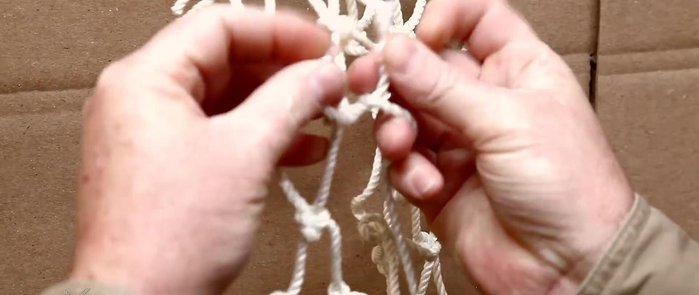
Secure the Initial Knot Ends Replace the Removed Section
- Begin from the left and sew from left to right, consistently picking up the back-side mash of the netting. This creates a seamless look consistent with the factory stitching.
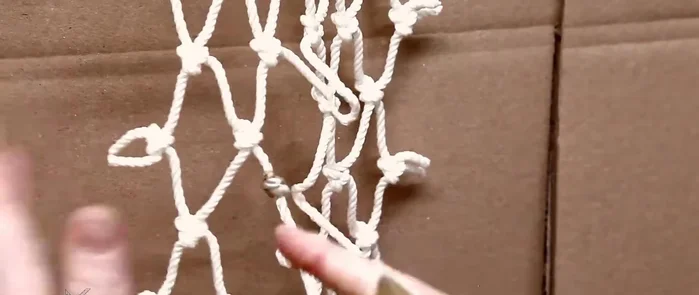
Replace the Removed Section Tie the Final Knot
- Carefully tie a square knot, maintaining the correct spacing between knots. Avoid a granny knot as it won't hold securely.
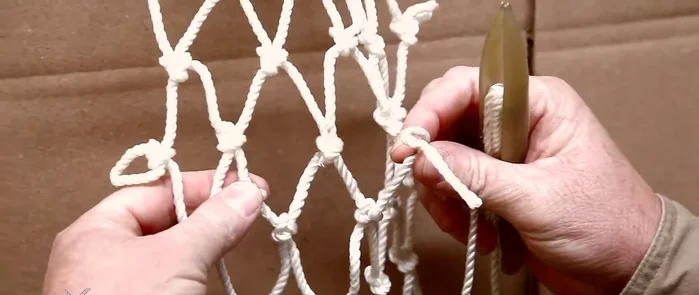
Tie the Final Knot Secure the Final Knot Ends
- Burn the ends of the twine to secure the final knot.
Secure the Final Knot Ends

Read more: Mastering the Soft Toss: Efficient Batting Practice Technique
Tips
- Make the hole slightly larger before starting the repair. This ensures a better-looking result.
- Practice tying square knots to ensure a secure repair. A square knot is crucial; a granny knot will fail.
- Burn each twine end individually to prevent loosening.
- Adjust the final knot to match the netting's tension and appearance.