Tired of wrestling with complicated instructions and flimsy materials when setting up your batting cage? The 30210 model batting cage net promises a quick and easy assembly experience, perfect for busy coaches, parents, and players alike. No more frustration, no more wasted time – just get straight to practicing those swings! This streamlined design prioritizes simplicity without compromising on durability or performance, making it an ideal choice for various skill levels and spaces.
This guide will walk you through a straightforward, step-by-step assembly process for the 30210 model batting cage net, ensuring you're ready to hit home runs in a matter of minutes. Forget struggling with confusing diagrams; we’ve broken down the process into clear, concise instructions accompanied by helpful visuals, guaranteeing a smooth and efficient setup experience. Let’s get started!
Preparation and Safety Guidelines
- 30210 batting cage net and frame package
- Screwdriver
- Carabiner Clips
- Bungee balls
- Ground stakes (optional)
- Always ensure the net is fully taut and securely fastened to the frame before use. Loose netting poses a significant risk of injury from errant balls.
- Never hit balls towards anyone standing near or behind the batting cage. Maintain a safe distance and clearly designate a safe zone.
- Regularly inspect the net and frame for any signs of wear and tear. Replace any damaged components immediately to prevent accidents.
Step-by-Step Instructions
Layout and Preparation
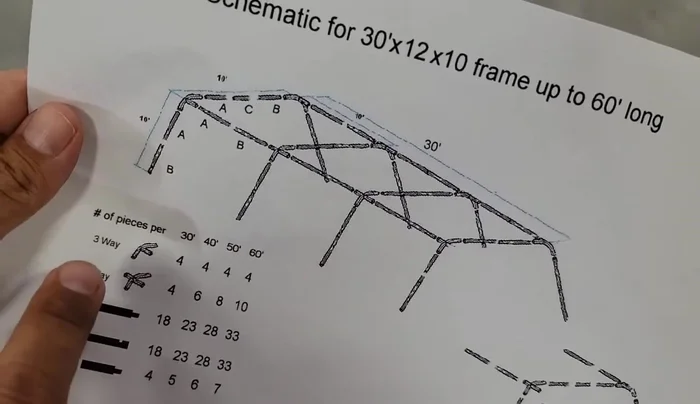
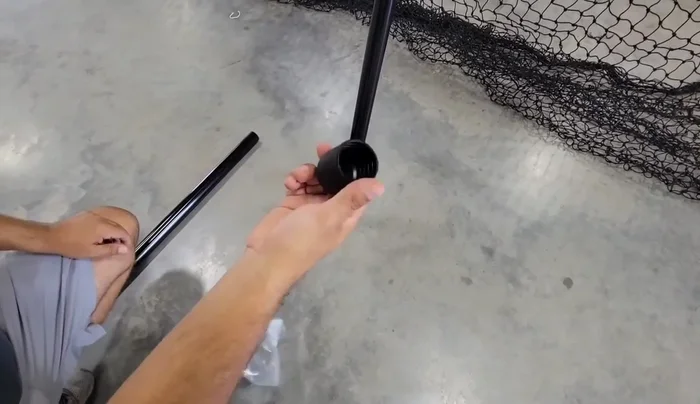
- Lay out all components according to the diagram. Separate poles (A, B, C) and fittings.

Layout and Preparation Assemble Top Frame
- Assemble the top half of the frame. Unscrew eyebolts to make fitting insertion easier. Secure fittings with eyebolts.
- Tighten all eyebolts using a screwdriver for better leverage. Ensure a snug fit.
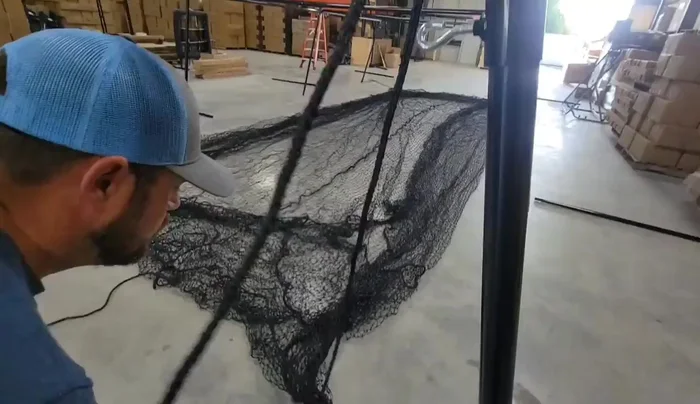
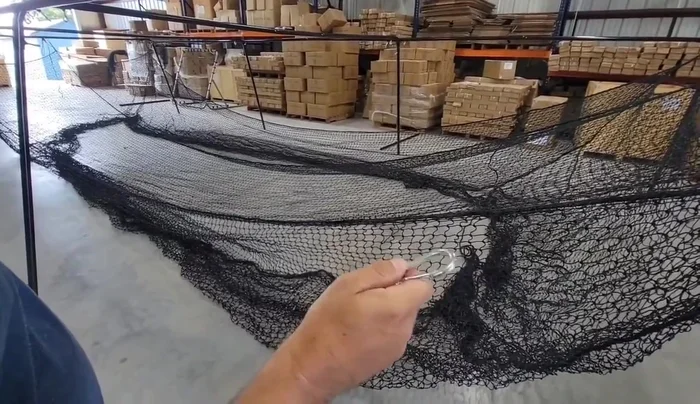
Assemble Top Frame Prepare and Attach Net
- Unroll the net, ensuring the rope border is facing outward. Locate the corner and center lead ropes.
- Tie the corner and center lead ropes to the frame fittings. Leave some slack; don't cinch completely. This allows the net to hang properly.
Prepare and Attach Net Hang Net on Frame
- Attach the net to the frame using carabiner clips. Secure each rope border to a fitting.
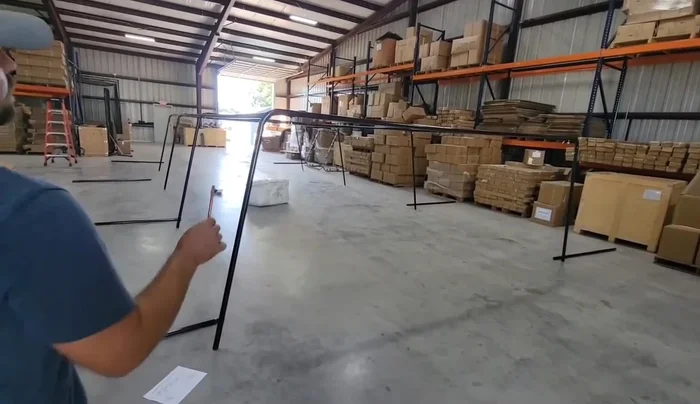
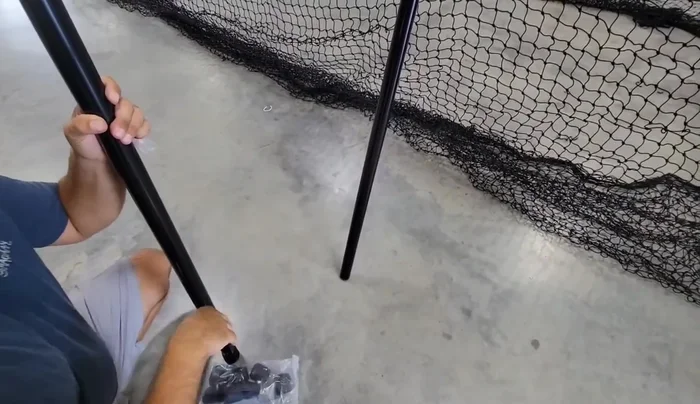
Hang Net on Frame Attach Feet and Raise Frame
- Attach the feet to the legs of the frame.
- With assistance, lift the frame and attach the remaining poles to complete the 10ft height. Use bungee cords to secure the net to the crossbars for easier handling.
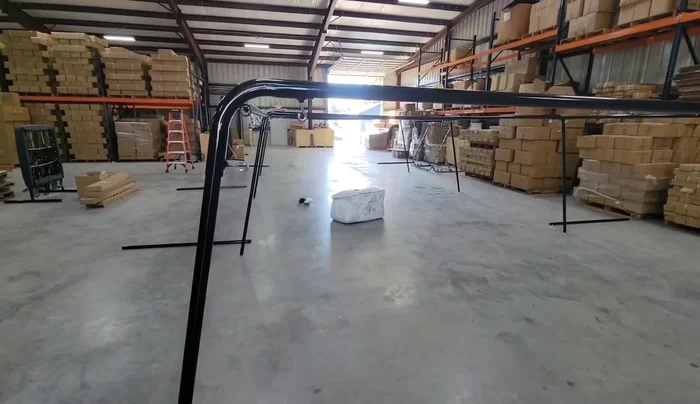
Attach Feet and Raise Frame Complete Frame Assembly
- Starting from the middle and working outwards, secure the remaining legs to the frame.
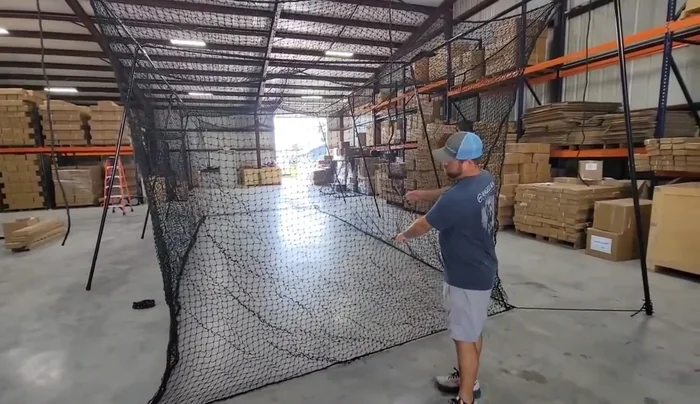
Complete Frame Assembly Final Adjustments and Optional Securing
- Adjust net sag by loosening or tightening the corner ropes as needed. Locate and utilize the net's built-in door.
- (Optional) Secure the frame using ground stakes for outdoor use. Attach ropes to the top of the frame, drive stakes into the ground, and then secure the ropes to the stakes.
Final Adjustments and Optional Securing


Read more: String Line Method for Perfect Batting Cage Alignment
Tips
- Use a screwdriver to tighten eyebolts for a secure frame.
- Leave slack in the net ropes when attaching to the frame. This allows for proper net sag and adjustments.
- Start attaching the remaining poles from the middle and work outwards for efficient assembly.
- Use ground stakes to secure outdoor frames.