Jugs pitching machines are invaluable tools for baseball and softball training, providing consistent and repeatable pitches for players of all skill levels. However, like any complex piece of equipment, the control board – the brain of the machine – can occasionally malfunction, leading to frustrating downtime and interrupted practice sessions. A faulty control board can manifest in various ways, from erratic speed adjustments to complete power failure, leaving you wondering how to get your machine back in top condition. Thankfully, many common control board issues can be resolved with some basic troubleshooting and repair skills.
This guide will walk you through the process of diagnosing and repairing a Jugs pitching machine control board, offering a step-by-step approach suitable for individuals with varying levels of technical expertise. From identifying common problems to replacing faulty components, we'll equip you with the knowledge to get your pitching machine back up and running efficiently and effectively. Let's dive into the detailed step-by-step process outlined below.
Preparation and Safety Guidelines
- Multimeter
- Soldering Iron
- Desoldering Tool
- Oscilloscope
- Replacement UJT (2N4071)
- 40W Light Bulb (Test Load)
- DC Power Supply
- Protective Gear
- Always disconnect the pitching machine from the power source before attempting any repairs. Failure to do so could result in electric shock.
- Use caution when handling internal components. Avoid touching sensitive electronics unnecessarily to prevent damage.
- If you are not comfortable working with electronics, consult a qualified technician. Improper repairs can lead to further damage or injury.
Step-by-Step Instructions
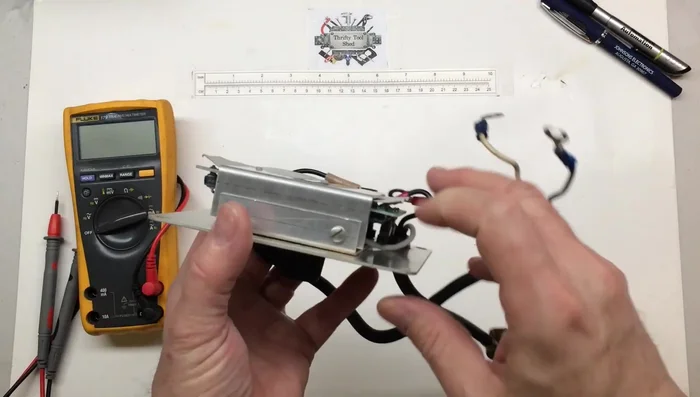
Initial Inspection and Power Check
- Inspect the control board and identify the components.
- Check the power supply (120V input) and fuse.

Initial Inspection and Power Check SCR and Voltage Regulator Check
- Verify SCR functionality by checking for continuity and gate voltage.
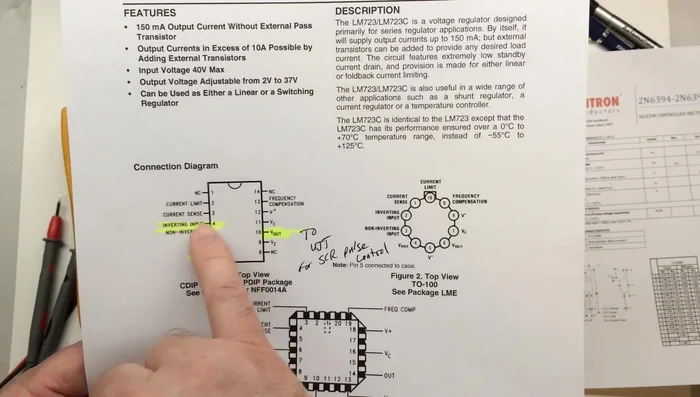
- Identify and check the voltage regulator (LM723).
SCR and Voltage Regulator Check UJT Diagnosis and Replacement
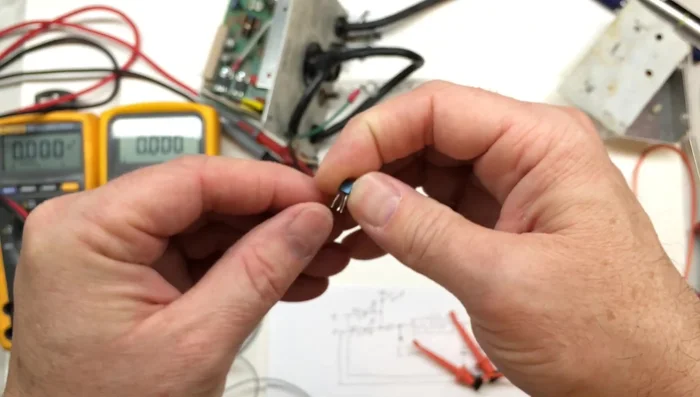
- Examine the UJT (2N4871) for functionality.
- Desolder and replace the faulty UJT with a new 2N4071.
UJT Diagnosis and Replacement Testing and Verification
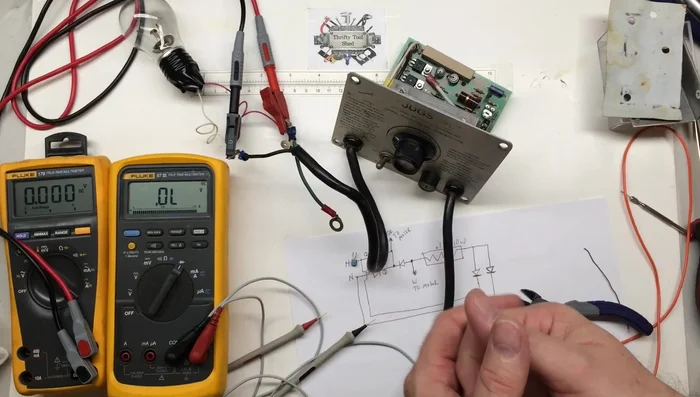
- Test the repaired board with a test load (40W light bulb) and monitor voltage output.
- Perform final checks with an oscilloscope to analyze the waveform.
Testing and Verification


Read more: Louisville Slugger Blue Flame Pitching Machine Assembly & Best Practice Tips
Tips
- Always exercise extreme caution when working with mains voltage.
- Use a limited current supply to protect against short circuits.
- When using an oscilloscope, remember that the outer shell of your coax is always referenced back to ground.