Ready to elevate your batting practice? This quick setup guide will walk you through the straightforward assembly of your new 7x7 hitting net, transforming your backyard or training area into a professional-level batting cage in minutes. Forget wrestling with complicated instructions – we've simplified the process to make getting started as easy as possible. Whether you're a seasoned player fine-tuning your swing or a beginner just starting out, a properly assembled hitting net is crucial for effective and safe practice.
This guide provides clear, concise instructions with helpful images (where applicable) to ensure a smooth and efficient assembly. Follow the steps below, and you'll be ready to hit those pitches in no time. Let's get started with step one and transform your training space into a batting haven!
Preparation and Safety Guidelines
- Always ensure the net is fully taut before use to prevent sagging and potential injury. Check all straps and connections are secure.
- Never hit the net with excessive force or use heavy metal bats. This could damage the net and cause injury.
- Set up the net on a level surface away from obstacles and other people to prevent tripping hazards and accidental injuries.
Step-by-Step Instructions
Connect Middle Poles
- Connect the two middle holes until you hear a snap.
Attach Legs to Middle Poles
- Attach one leg to a middle pole.
- Repeat step 2 for the other leg.

Attach Legs to Middle Poles Attach Bottom Sleeves to Legs
- Feed the bottom hole sleeve through the bottom leg on one side.
- Repeat step 4 for the other side.
Attach Bottom Sleeves to Legs Attach Top Holes to Poles
- Connect the top hole, ensuring it's over the middle silver bar before sliding it up and connecting it to the pole.
- Repeat step 6 for the other side.
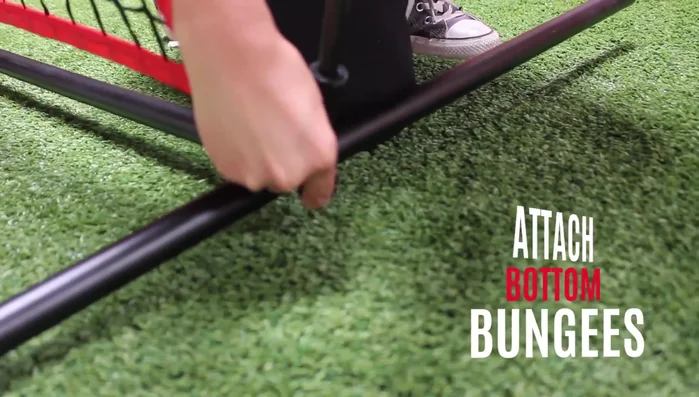
Attach Top Holes to Poles Attach Bottom Rods
- Connect the bottom rods to the hooks on the legs.
Attach Bottom Rods Attach Velcro
- Attach the velcro.
Attach Velcro


Read more: Repairing Heavy Hitting Netting: The Professional Method
Tips
- Make sure the top hole is over the middle silver bar before connecting it to make sliding easier.
- Stand on the inside when connecting the top loop.