TrackMan, the leading radar-based golf performance measurement system, offers unparalleled insights into your swing and ball flight. Understanding how to properly calibrate your TrackMan B1 unit is crucial for obtaining accurate and reliable data, impacting every aspect of your pitching analysis, from launch angle to spin rate. Inaccurate calibration can lead to skewed data, hindering your progress and potentially leading to flawed coaching decisions. Therefore, mastering this process is essential for any serious golfer utilizing this technology.
This guide provides a comprehensive, step-by-step approach to calibrating your TrackMan B1 pitching system. We will walk you through each stage, ensuring you're equipped to confidently obtain precise data, paving the way for improved performance analysis and ultimately, a better game. Let's dive into the detailed process, ensuring your TrackMan B1 is calibrated correctly and ready to help you refine your pitching.
Preparation and Safety Guidelines
- Trackman B1
- iPad
- Measuring Tape
- Tripod
- Always ensure the TrackMan B1 unit is properly positioned and leveled according to the manufacturer's instructions. Incorrect placement will lead to inaccurate data and potentially damage the equipment.
- Never attempt to calibrate the TrackMan B1 while it is in use or actively tracking pitches. This could result in system errors or data corruption.
- If experiencing persistent calibration issues, contact TrackMan support. Improper calibration attempts may void your warranty.
Step-by-Step Instructions
Start a New Pitching Session
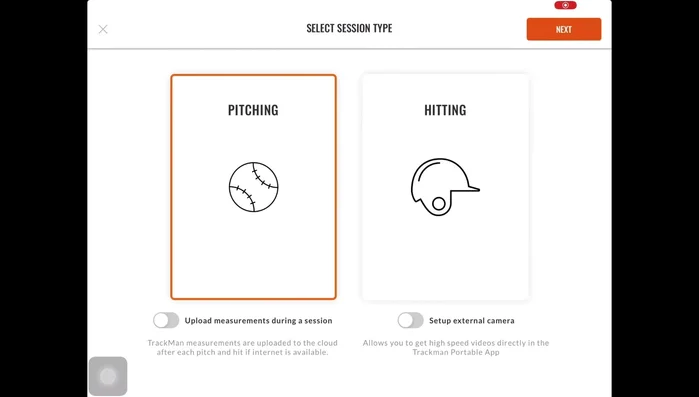
- Open the Trackman application and select 'New Session', then 'Pitching', and 'Next'.
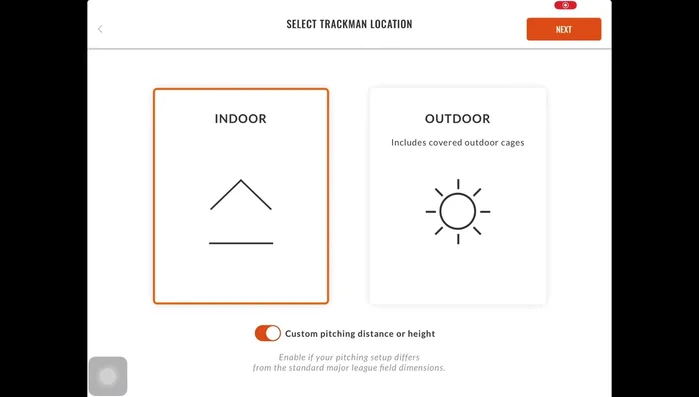
- Select 'Indoor' or 'Outdoor' based on your location, then 'Next'.

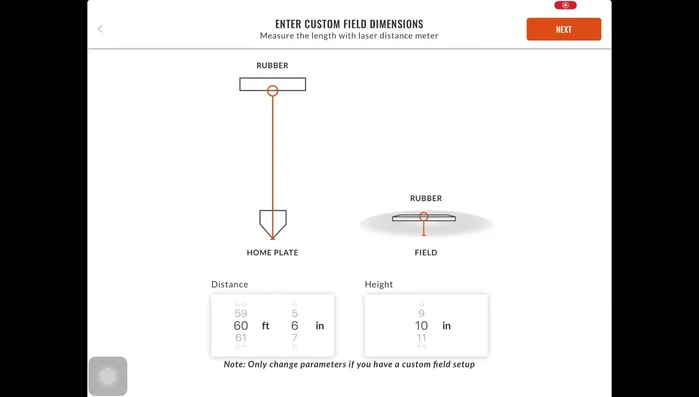
Start a New Pitching Session Set Up Pitching Distance and Height
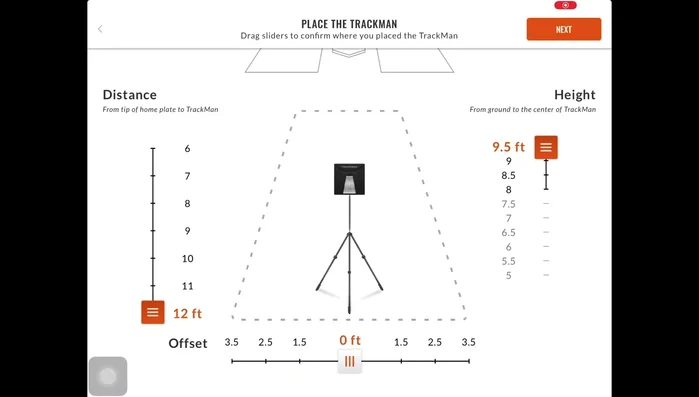
- If your setup isn't a standard 60 feet 6 inches, select 'Custom Pitching Distance or Height'. Measure the distance from home plate to the B1 tripod (tip of home plate to middle of tripod) and the height of the B1 (ground to middle of B1). (Optimal setup is 12 feet distance and 12 feet height)
- Input the measured distance and height into the application via the side bars. Add the offset of the B1 and select 'Next'.
- If using standard setup, you can skip step 4. For a standard setup, measure the distance from the pitcher's rubber to the tip of home plate (within one foot of accuracy). Adjust the height of the rubber (within one foot of accuracy).
Set Up Pitching Distance and Height Verify B1 Placement and View
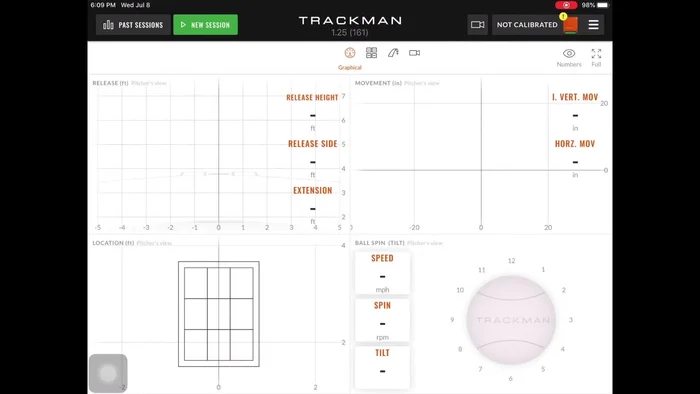
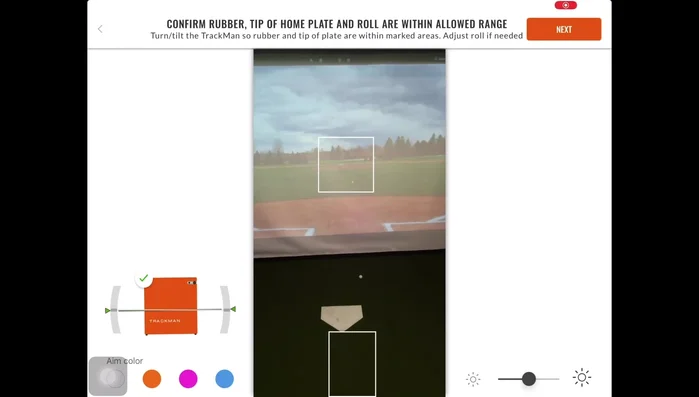
- Check the Trackman B1 view. Ensure a clear view with no obstructions and that the netting won't interfere with the ball's flight. The bottom left corner should show a green checkmark indicating the B1 is level. Adjust the tripod if needed.
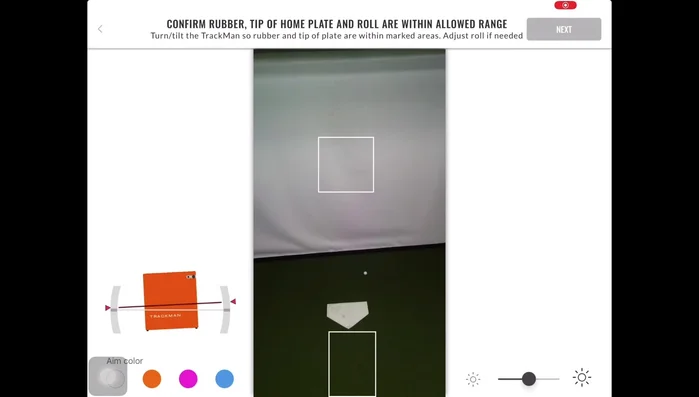
Verify B1 Placement and View Aim and Calibrate Home Plate
- Aim the Trackman B1. Use the two boxes shown on the screen; the higher box for the pitching rubber and the lower box for home plate. Aim home plate first, ensuring it's towards the top of the lower box and completely within the parameters. Then adjust for the rubber, aiming towards the bottom of the upper box. Use the tripod mount to adjust tilt and pan.
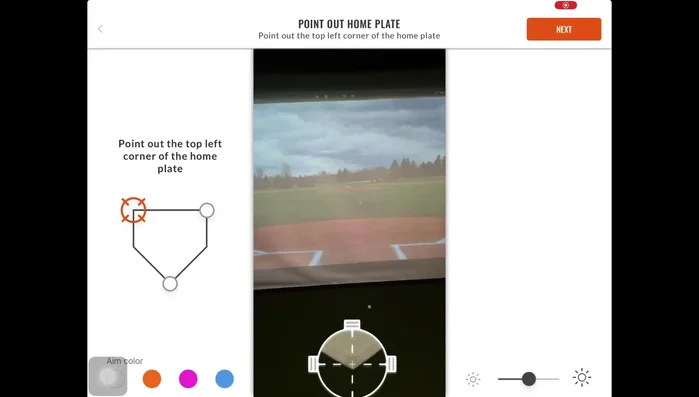
- Point out home plate by placing crosshairs in the top left, top right, and tip of home plate. Use the 'Find Target' and 'Adjust' features to get as close as possible.
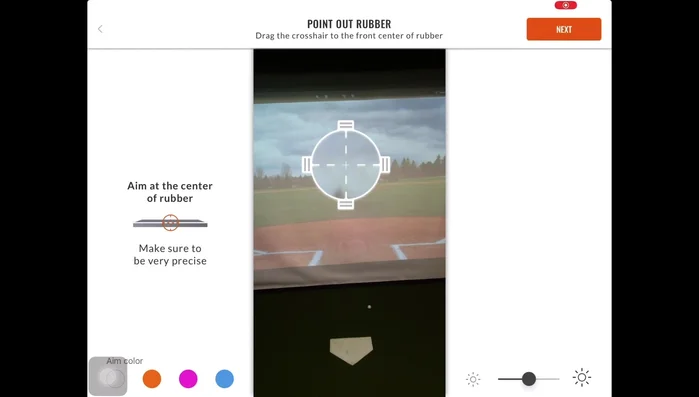
Aim and Calibrate Home Plate Aim and Calibrate Pitcher's Rubber
- Point out the rubber. Place an object (baseball, marker) on the middle of the rubber. Use the crosshairs to pinpoint the bottom of the object. Use fine adjust if needed.
Aim and Calibrate Pitcher's Rubber Finalize Calibration
- Select 'Next'. The calibration will complete. A green light will indicate the B1 is ready to track.
Finalize Calibration
Read more: Louisville Slugger Blue Flame Pitching Machine Assembly & Best Practice Tips
Tips
- Ensure accurate measurements for custom setups to avoid calibration errors.
- Maintain 2-3 feet of space between the B1 and the net.
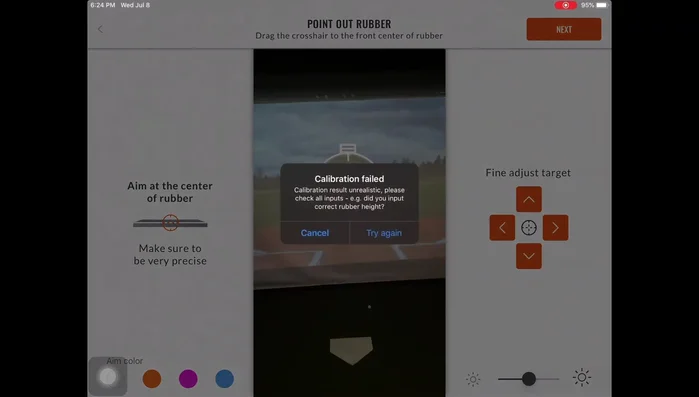
- If you encounter errors like 'unrealistic calibration rubber height', double-check your setup matches standard base dimensions or use custom dimensions.